Building Strong & Stylish Support
Every spring, once I’ve figured out when do I plant tomatoes, it’s time to get my cages ready. I don’t like the store-bought kinds—they’re too short, bend too easily, and don’t hold up over time. My method? I make my own permanent cage system using concrete, welded-wire, and old livestock panel pieces I’ve saved in the garage. These cages hold up season after season, look great with a rustic industrial style, and bring a clean, decorative feel to my garden bed. The galvanized finish handles rain without turning too rusty, making them super tough in low light, shaded, or sunny spots. Even after spraying with Krylon or Hunter Green spray, their charm doesn’t fade. Mix in a little white paint on top for safety in low-light, and they earn their place as both support and garden art.
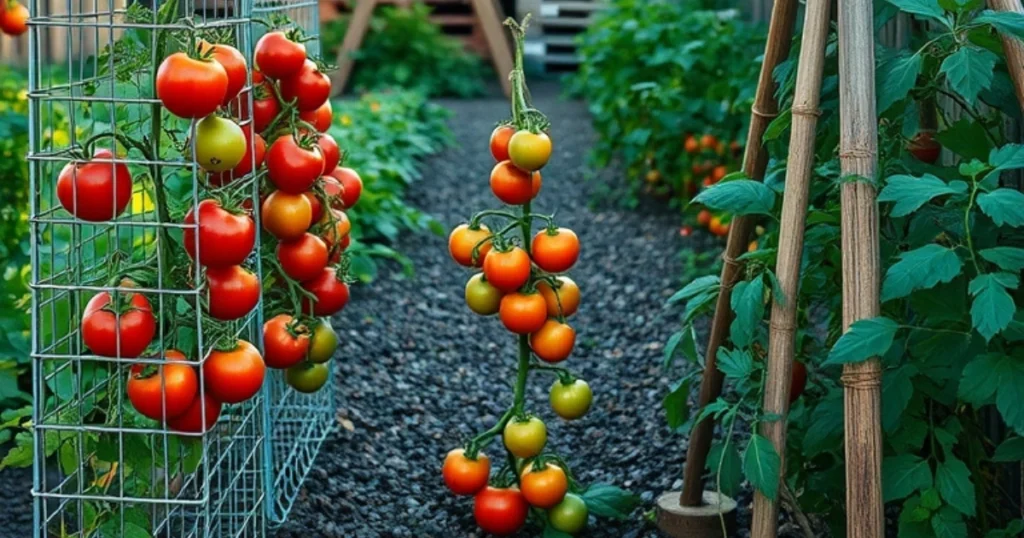
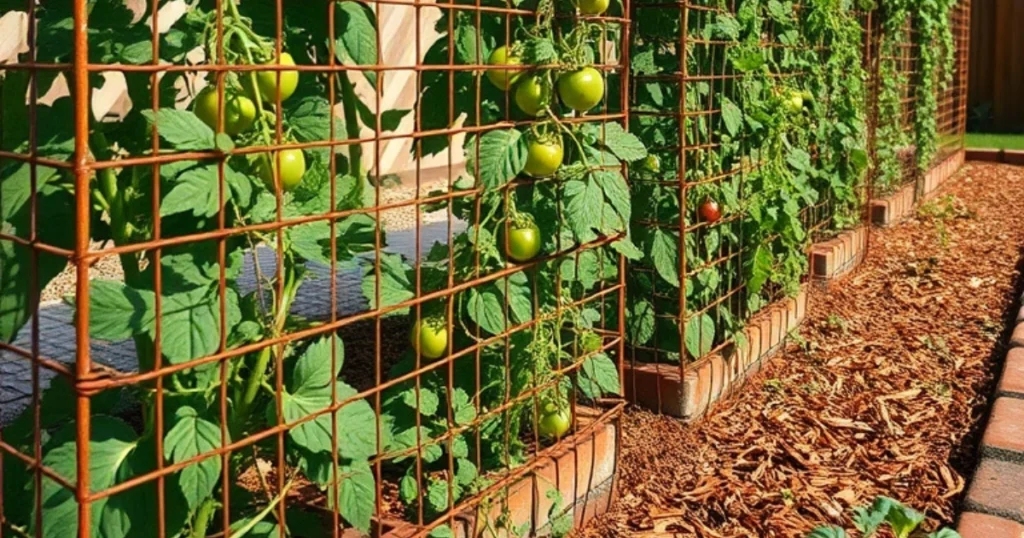
Street-Smart Looks
My neighbors often stop to ask why the veggie bed looks like a mini art show. The truth is simple: I bend concrete wire into a cage that gives the beds a cool industrial style. The shiny galvanized finish starts new, turns a bit rusty, but never gets brittle; that aged look fits both old bricks and fresh mulch. Because the grid is square and neatly patterned, light slips through and shows off the green tomato plants, climbing peas, even dwarf palms and palm seedlings. At six feet height it feels tall yet still short enough for me to pick fruit without a ladder, and the open mesh lets wind pass so the vines stay durable. I once watched my neighbor’s kids use a panel to pen their baby goats and other livestock, proving how handy and large this single metal frame can be. Better yet, it looks downright attractive next to plastic hoops, so the whole garden gains instant curb appeal.
How to Build Your Own Tomato Cage Easily
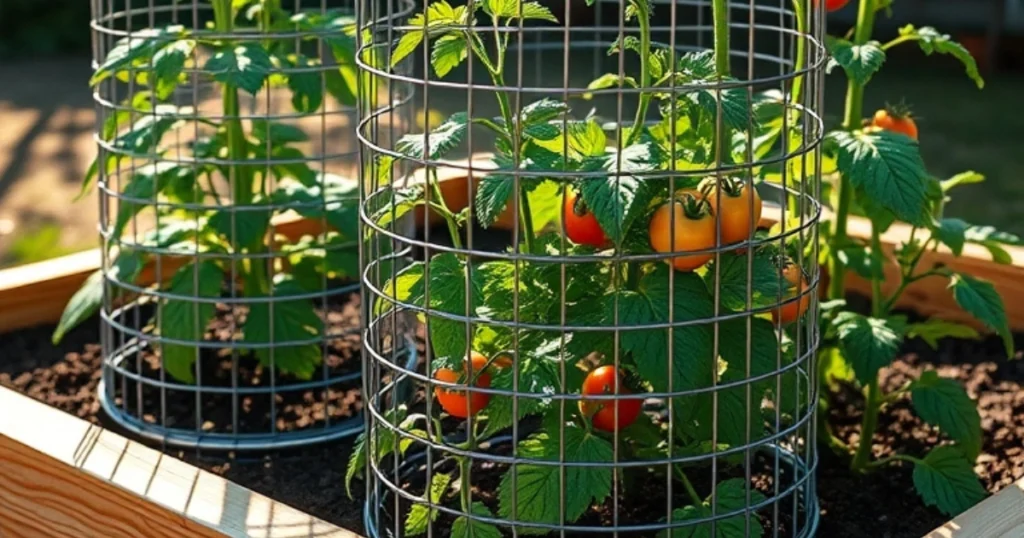
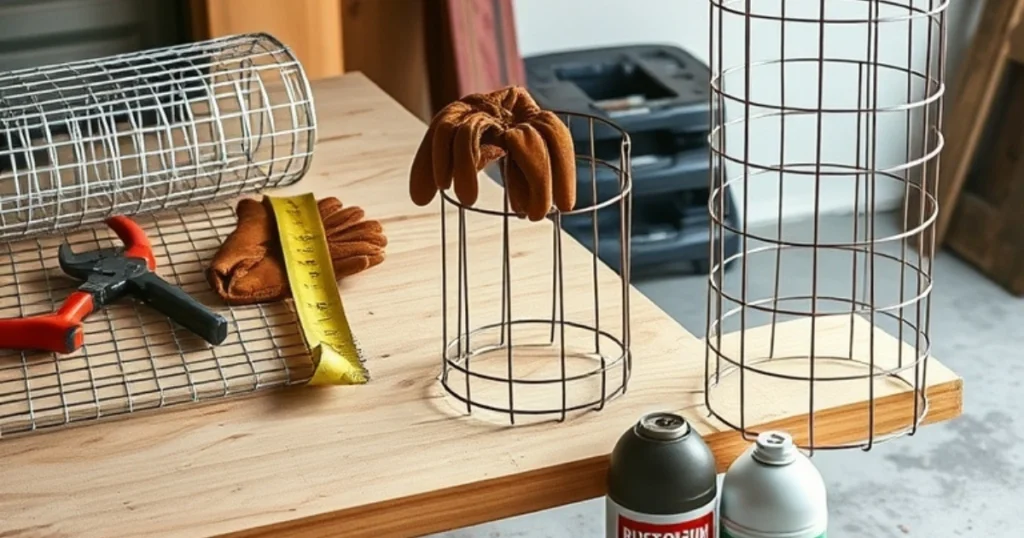
Start by grabbing a 150′ roll of welded-wire or steel mesh from home-depot or a farm supply store. Unroll the wire and use cutters or pliers to trim to your desired length and width—usually around 5 to 6 feet tall and 14″ in diameter. Use a tape measure to check, but don’t stress precision too much. Cut the mesh at the squared openings to keep a tidy patterned shape. Use the extended wire ends to wrap the mesh into a tight circle. Then, use gloves for safety while bending the bottom wires into pointed ends. These act as DIY anchoring stakes once you insert the cage firmly into the soil. This press action adds stability and strength, even in heavy mulch or a yard with uneven dirt.
Make the bottom stronger by cutting off the bottom ring so you can get longer spikes into the earth. I’ve found it’s best to make the cage structure before painting—it saves on paint and makes application cleaner. I like to use heavy rust primer first, then add a coat of spray in Hunter Green, and finish it off with white paint for visibility. This not only protects but also gives a very solid look. Believe it or not, kids and visitors often ask how much the cages cost, expecting them to be pricey. Truth is, it’s a one-time investment with long-term payoffs, especially if you’re also planting potatoes in a barrel or planning a tomato-heavy season.
To tie panels together neatly, use small cable ties—I use three per cage: top, middle, and bottom. They make the structure firm and the grid tighter. Sometimes I use old spray cans in red, green, gray, or even paint random crops like strawberry, peas, peppers, or palm starts just for fun. These cages are storable, attractive, and easy for mentoring young gardeners learning to grow vegetables like edible tomatoes and seedlings. Their adaptable pattern, heavy metal strength, and neat patterned wire grid structure suit any farming setup. I always keep track of the number I’ve built by writing on the cage directly before I purchase more wire.
Final Thoughts from the Garden
After years of growing tomato plants, I’ve found that using a mix of concrete and wire fencing for my plant cages gives the best results, especially for those tall 6-10 foot or 5-6 feet vines. I like to try different styles, from cedar ridge square foldable tomato cages to simple wood-framed or bamboo trellises, and even sturdy cylinders made with 14 gauge wire. For a low-cost setup, I use stakes, ties, and sometimes furring strips or sturdy branches for extra support. The large openings in the cages make it easy to check on the growth and pick the fruit. I always label each type—from indeterminate to bush varieties—and store the cages after the season. Sharing my tips on my garden channel and watching other gardeners’ videos helps me improve my support system every year, whether I’m using metal cages, remesh, or building an A-frame trellis. No matter how you build them, strong cages make for better harvests and keep your plants growing tall and healthy, ready for the next move or new stake.