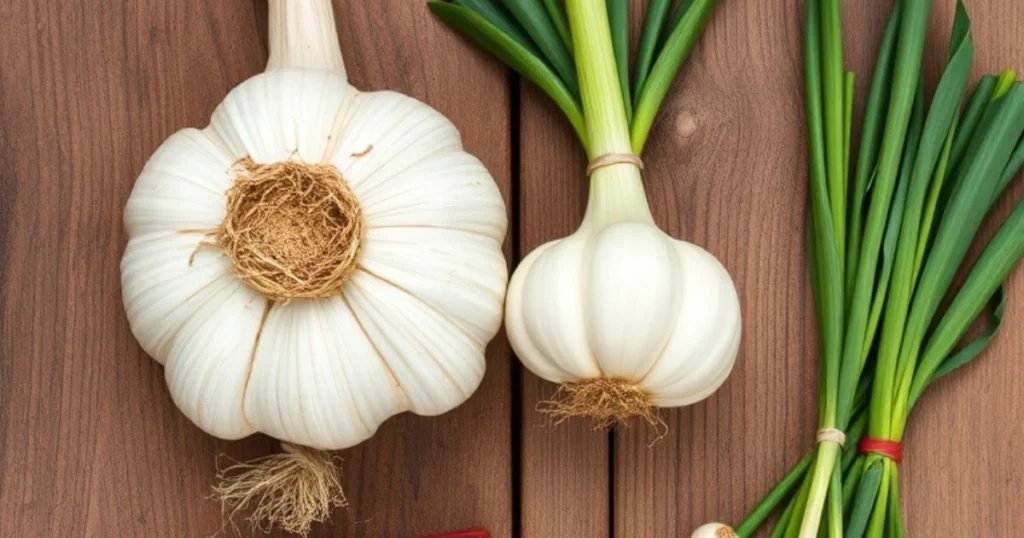
Growing Glorious Garlic in the Changing Seasons
There’s something incredibly satisfying about growing glorious garlic in the spring, especially when the weather, climates, and temperatures finally shift from cold winter to warm summer. I always keep my garden schedule flexible, allowing space for planting this herb as soon as the cool season fades and the soil becomes ready—Mother Nature really sets the rhythm with her periods of warm, then hot days. Using certified organic garlic from Keene’s upon arrival, I plant each bulb in a sunny place, slipping on my garden gloves, and giving them time to sprout, grow, and establish roots before the heat kicks in. My kitchen always welcomes the flavor, whether it’s in soups, stews, or hearty meat, fish, or poultry dishes, and even a small harvest offers freshly harvested, tasty, and healthy results I can store for months.
Easy Guide to Growing Spring Garlic Successfully
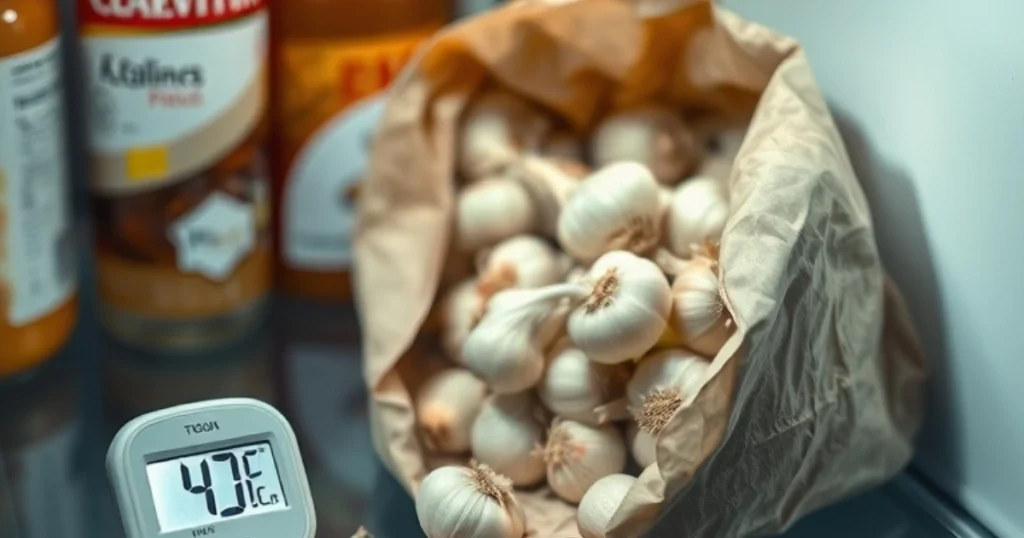
Having gardened in various regions, including some unforgiving northern zones, I’ve learned that choosing the right garlic varieties for Canada—especially rocambole garlic—can make a big difference when planting in early spring. Whether you’re interested in harvesting a flavorful spring garlic crop or full garlic bulbs, timing and technique matter. For success, start with cold stratified bulbs or garlic cloves stored at 40 degrees for proper cold treatment. Whether your soil is soft or still frozen ground, as long as it can be worked, it’s a good time to plant. Separate cloves from the bulb and plant each individual clove with the root side down and the pointed end up. Use a 6 inches, 4 inches, or just 3 inches spacing depending on your purpose—closer for green garlic, wider for full bulbs.
I love green garlic because it grows quickly and offers tender leaves, bright green leaves, small bulbs, and a fresh garlicky flavor that elevates salads, pastas, and quick sautés. Even the tough leaves can be reused in pesto or to infuse oil for cooking. Still, for full heads with multiple cloves, you’ll want to allow your garlic enough time and use a helpful garlic fertilization soak to kickstart root growth—this is especially important for spring-planted garlic. I typically broadcast Keene Garlic’s organic blend or a simple all-purpose fertilizer into the garden, and always finish with a few inches of mulch—like straw, chopped leaves, or leaf clippings—to trap moisture, protect from temperature swings, and control weed pressure.
Don’t overlook follow-up care either. Whether replanting a single clove or hoping for good-sized bulbs, consistent watering with compost tea helps maintain moist soil. If shoots have emerged, you’re on the right track—just let them grow and mature until harvesting time in summer. It’s okay if some bulbs remain small with only round cloves instead of splitting into multiple cloves; these can be re-planted and will often perform better the following season. Spring garlic needs a little boost compared to its autumn-planted cousins, which get a natural head start. But with the right spacing, soil prep, fertilizer, and a bit of patience, you’ll have delicious garlic—grounded, nurtured, and perfectly suited for Canadian gardens.
Simple Steps for Vernalizing Garlic Before Spring Planting
When planting spring garlic, especially in colder areas like zone 5 or my own garden in Wisconsin, I’ve found it’s useful to mimic nature’s vernalization process. Whether you’re working with hardneck garlic, softneck garlic, or even porcelain garlic, give your garlic cloves a cold period by storing your planting stock (or seed garlic) in the refrigerator for four to eight weeks before planting. Place the cloves in a plastic baggie, poke holes or leave it open for ventilation, then check them weekly to avoid moisture, mold, or signs of sprouting—if roots appear, plant them right away, ideally early in the season. If a thaw happens in late winter or very early spring, take advantage of the planting window, as Mother Nature may naturally vernalize your garlic during those winter months. In my experience, even without the fridge, spring garlic can still grow, though there’s a risk it won’t form individual cloves. I often make it part of my weekend tasks when growing garlic in raised beds, especially in October or November, when the cold weather reliably triggers the sprouting process, giving the garlic a clear benefit by setting it up for strong growth come fall or spring.
Step-by-Step Spring Garlic Planting Method
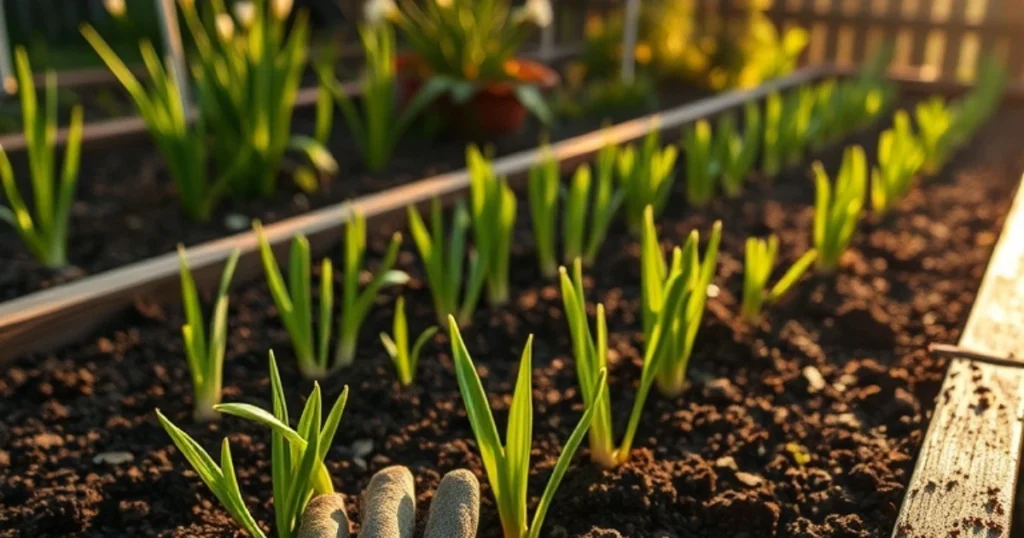
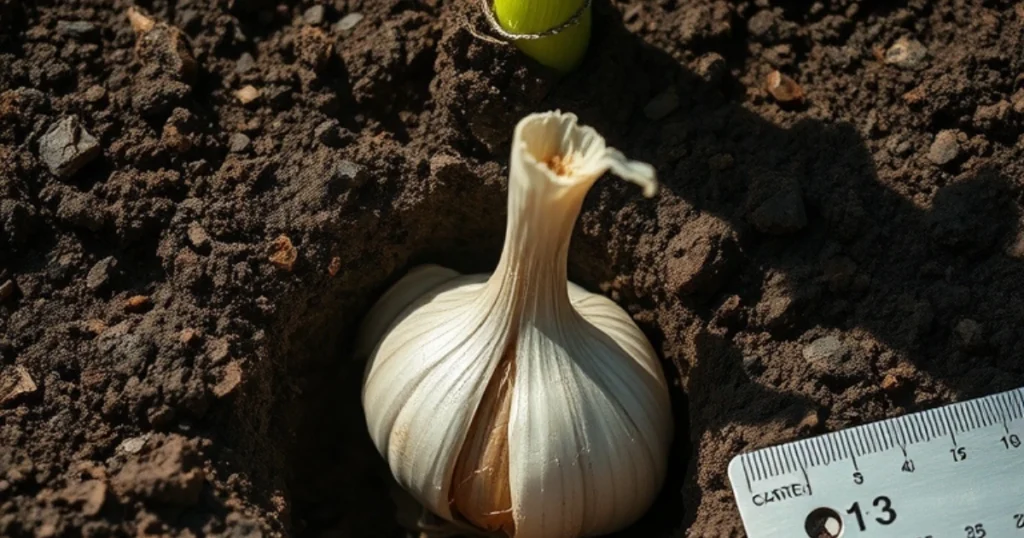
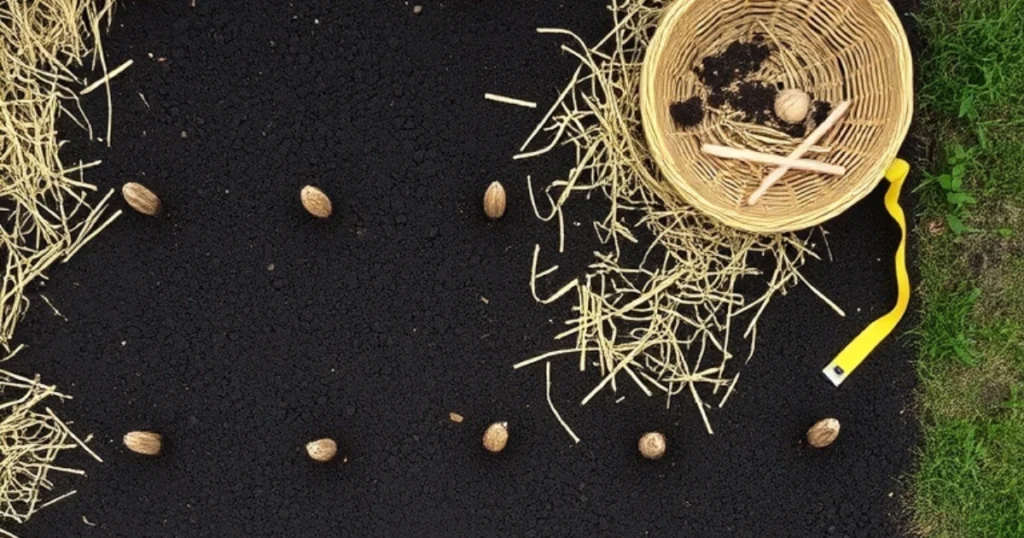
One of my favorite spring tasks is getting out into the garden beds during a warm planting weekend in February or March, right when the soil starts to loosen. For spring planted garlic, timing is key—choose a planting window in early spring, especially if your region experiences colder weather, to give bulbs the needed chill period before growth starts. Prepare your planting area with rich compost, potting mix, and a bit of Keene Garlic’s Organic Garlic Fertilizer or another good all-purpose vegetable garden fertilizer. Whether you’re growing in containers, pots, or traditional beds, make sure your setup gets direct sun, has good soil volume, and proper drainage. I mix in some organic fertilizer, water well, and space my cloves with care. Use a trowel or dandelion digger to go four to six inches deep into the soil, then plant the clove with the root side down and the pointed end facing up. Each garlic clove should be covered with one inch of soil over the tip of garlic to protect from temperature swings.
To get full garlic bulbs, proper garlic spacing is essential. When I plant in a garlic planted in 6 in. grid, I use my old rake handle or a measuring tape to measure every 6” apart, especially when growing large crops in garden rows. If space is limited, try 4” apart, though tighter spacing might result in smaller bulbs. I set Green Garlic Bulbs and whole bulbs 3–4” apart for better air flow and sun access. If you’re after green garlic, individual cloves can be tucked 1–2” apart—great for balcony planters or a deck garden. Don’t forget to cover everything with a layer of mulch like straw to keep moisture, block weed pressure, and regulate soil temps. Regular watering and feeding with compost tea or a diluted granular fish fertilizer every couple of weeks helps roots grow strong. This method has worked wonders for my garlic crops and taught me exactly how to prepare garlic for storage, by ensuring healthy growth and minimal weed pressure right from planting to harvest.
Tips for Maintaining Healthy Spring Garlic
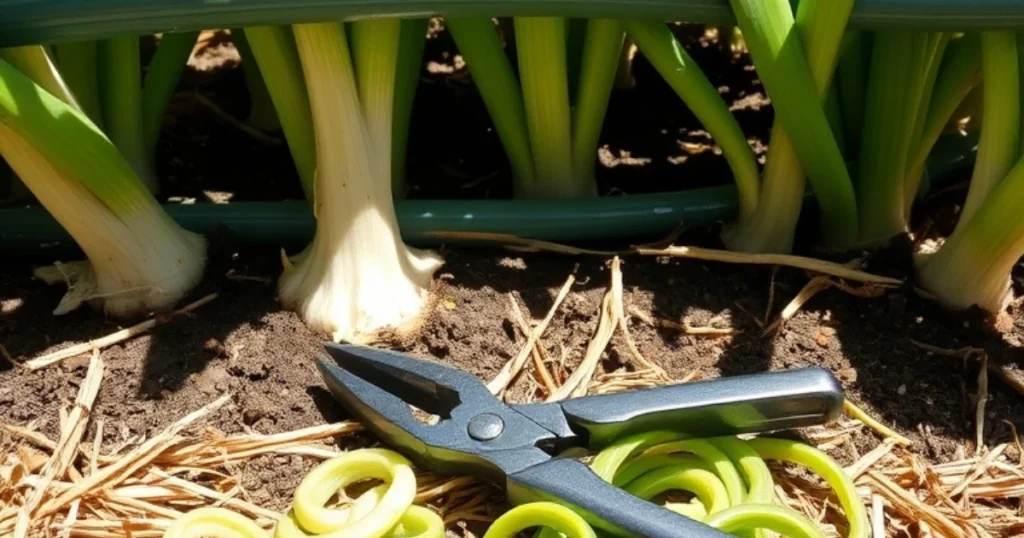
When tending to my spring planting garlic varieties, I treat them as a low maintenance crop that still needs care. Since garlic is a heavy feeder, I feed regularly by working compost, organic fertilizer, alfalfa meal, or fish fertilizer into the organic soil in the planting area for stronger roots and to form large bulbs. After watering the garlic bed using a watering wand or watering tool, I add mulch like straw, grass clippings, or hay to suppress weeds, retain soil moisture, and protect against soil erosion and wind. During early summer, I clip off the looped scapes with garden snips or hand pruners—these are perfect as a garlic clove substitute in your favorite recipes.
I monitor moisture every few days to maintain damp, not saturated, soil, ensuring about 1 inch of water per week—more if dry weather sets in. A smart watering schedule and watering frequency are key during the spring season, especially if springtime rain is light. Garlic should be weeded often since it does not compete well with broad-leaved weeds or any weed growth poking through the mulch layer or mulch bed. As garlic sprouts and green garlic leaves emerge, I apply fertilizer every 10–14 days for a consistent feed, following the correct application rate. Regular care in early spring through to harvest keeps my spring garlic crop healthy and strong, and even in my onion patch, they get special garden care for best results.
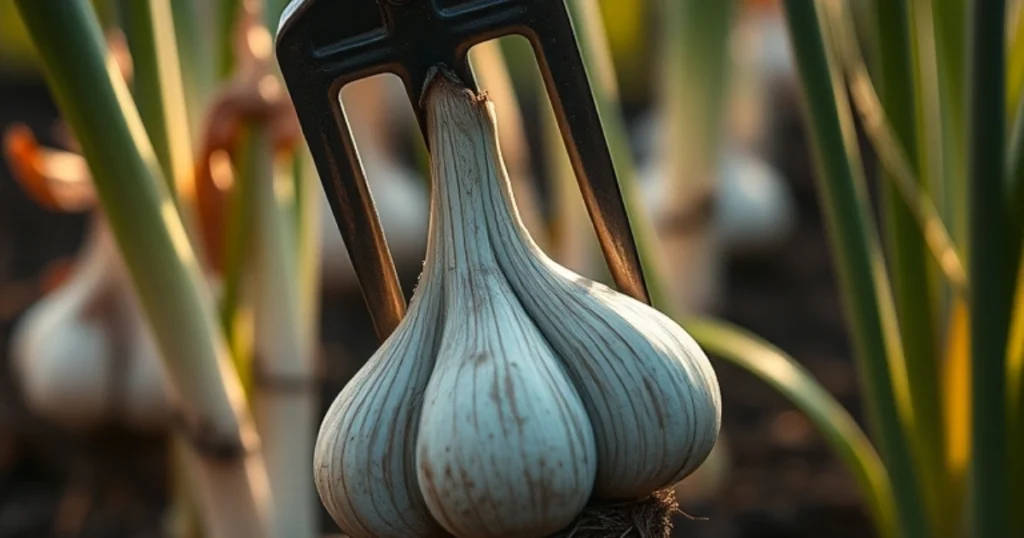
When and How to Harvest Spring Garlic Successfully
When spring planted garlic is ready, I always keep an eye on the lower leaves—once three to four have turned brown and dried up, that’s the best way to know it’s time to harvest. I gently dig using a garden fork to gently lift the bulbs from the soil, especially in my Southern Wisconsin garden where I typically harvest around mid-July, depending on the season. While Spring Garlic often takes extra weeks and may not size up like a Fall Planted Garlic or fall planted bulb, the perk is that these spring planted bulbs can store longer. So even if the harvest times are a bit later or the bulbs are smaller, they’re completely normal, and great if you’re growing garlic in clay soil or trying to catch up to an early fall crop.
Final Thoughts on Getting the Most from Spring Garlic
Planting garlic in spring is totally possible, but expect a shorter growing season, smaller bulbs, and a later harvest than with fall planting, as the cloves may miss the full cold period for strong bulb formation. I always try to compensate by planting early, as soon as the soil can be worked, ideally 6–8 weeks before the last frost, to take advantage of the cool weather. Spring garlic can still produce edible rounds or even full individual cloves, and while fall garlic may take eight months to mature, spring crops often need just two months to harvest by mid-summer. The most common mistake is planting near crops like peas, beans, sage, asparagus, or parsley—garlic can inhibit their growth and affect soil health—and avoid planting with onions, chives, or leeks from the allium family, as they attract pests like onion maggots.